FIELD MANUAL // 03
Cards
How you earn cards, the three card types, and how to play them
This chapter covers the card economy: how you earn cards, what the three types are for, and how a play actually happens on screen. For what each card does, see the Card Reference.
Cards are the currency of diplomacy. You spend them in negotiations, play them for tactical effects, and score them at game end. The deck is a closed loop: played, discarded, and burned cards (a burned card is destroyed without being played) all return to the pool at once, so the deck never runs out.
Earning cards
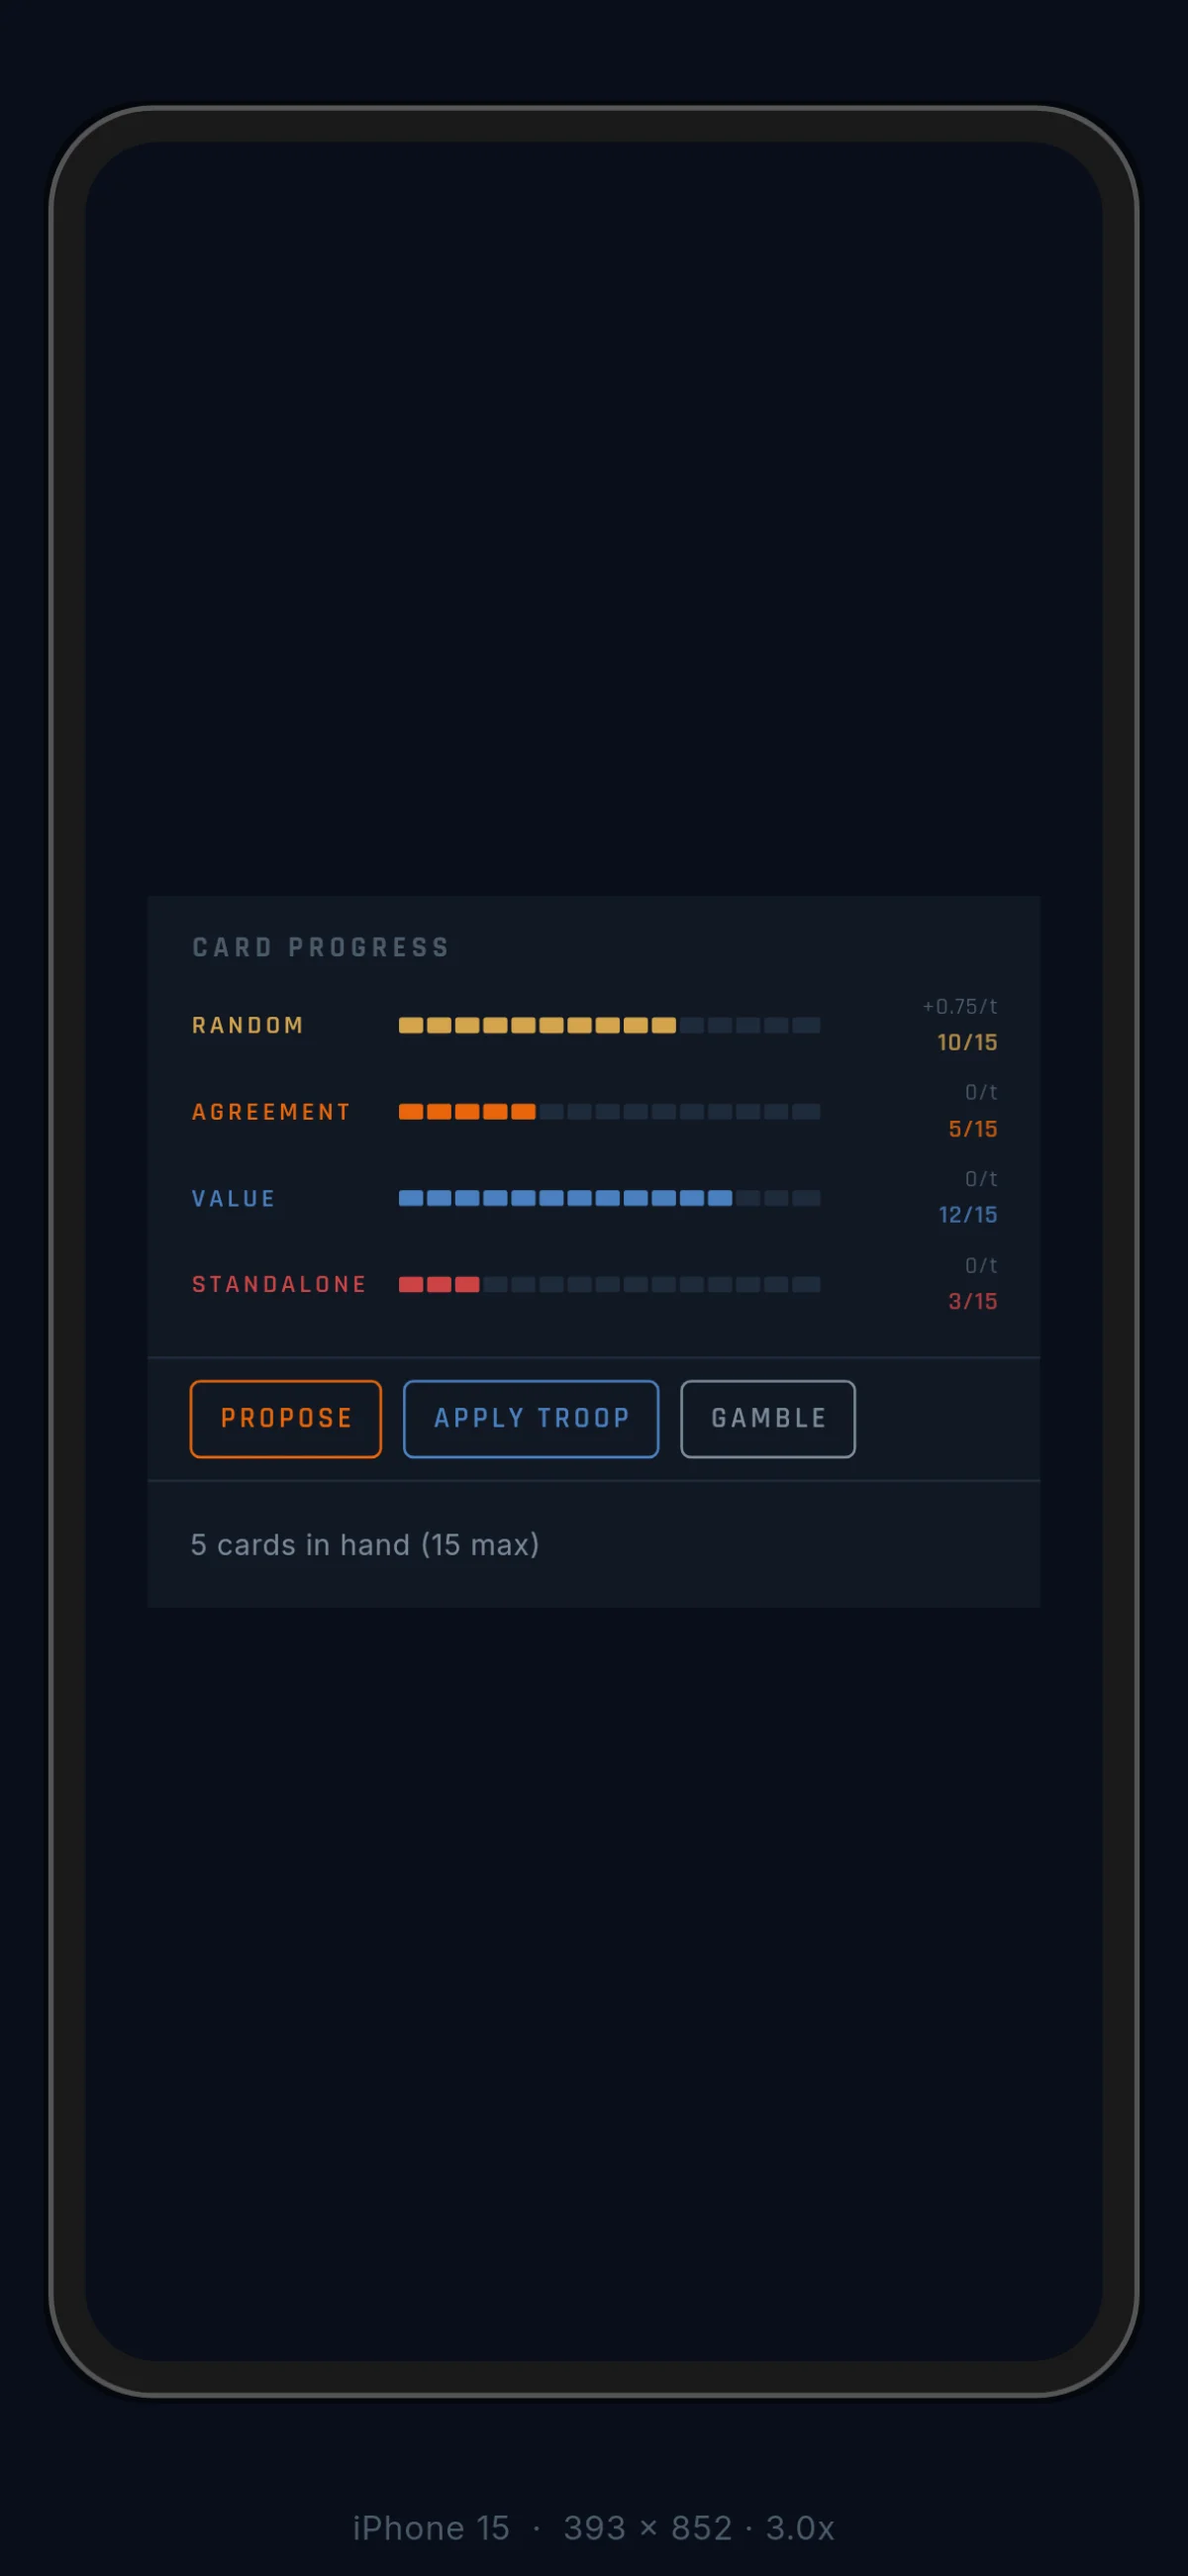
You earn cards through four tick counters, one per draw type:
| Counter | Draws | Fed by |
|---|---|---|
| Random | any card from the full deck | territories you hold |
| Agreement | an agreement card | bonus zones |
| Value | a value card | bonus zones |
| Standalone | a standalone card | bonus zones |
At the start of your turn, the random counter gains 0.25 ticks per territory you hold. The other three counters fill only from bonus zones that pay card ticks. When a counter reaches 15, you draw one card of that type and the counter resets, carrying any remainder.
Territory drives your random income; bonus zones drive targeted income. A wide empire draws steadily from the whole deck. A player sitting on the right zones draws exactly the card types they want.
| Territories held | Random ticks per turn | Turns to a card |
|---|---|---|
| 5 | 1.25 | ~12 |
| 10 | 2.5 | 6 |
| 20 | 5.0 | 3 |
| 60 | 15.0 | every turn |
Each row of the tick widget shows its own rate, so you can read your per-turn card income at a glance. When a Manufacturing Partnership is changing one of your rates, a multiplier badge appears in the widget title and the rates shown are the adjusted ones.
Three card types
Agreement cards start negotiations. You propose one to another player, fill its slots with value cards, and a binding pact forms: Ceasefire, Territory Transfer, Covert Support, or Manufacturing Partnership. How pacts work is covered in Agreements; the per-card terms live in the Card Reference.
Value cards are the currency inside deals. They fill agreement slots, and they score points at game end. You can also self-apply one for quick troops on credit — see Value Card for the payback terms.
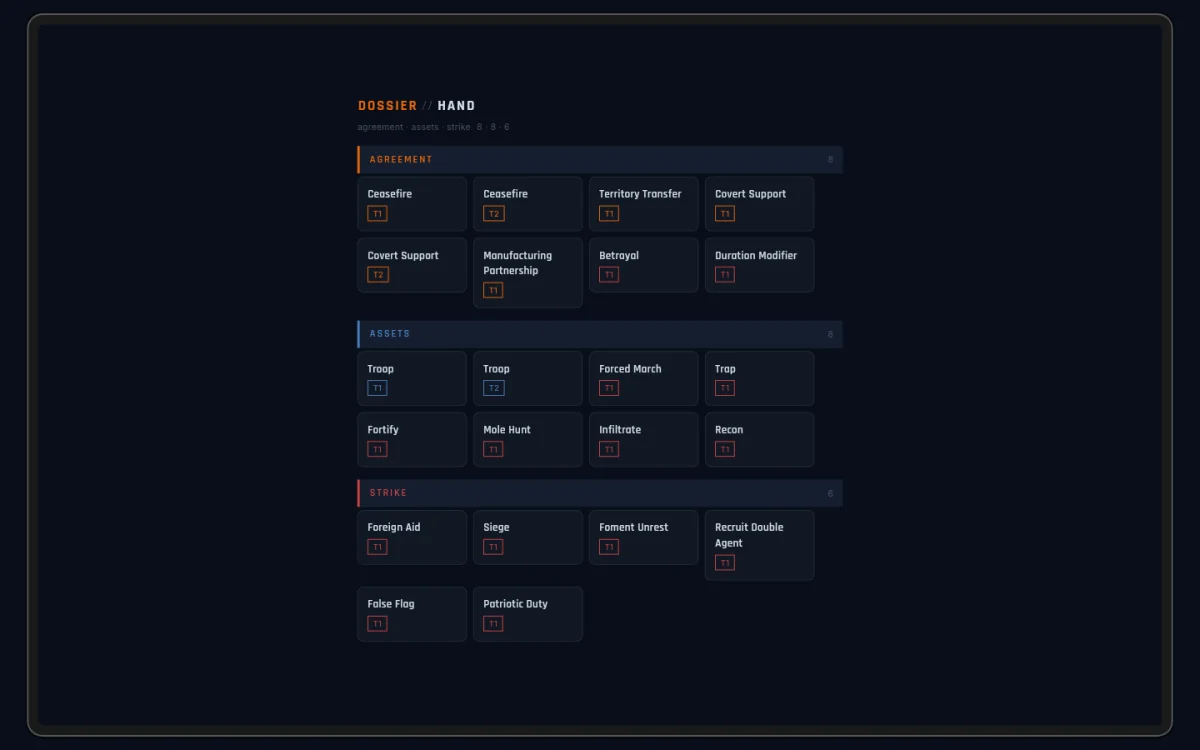
Standalone cards are solo plays with direct effects. No partner needed. Fourteen kinds ship today, in two families: a tactical eight that move troops and shape combat, and six intelligence cards that move what other players believe. Tactical Cards covers when to use them; the Card Reference carries every number.
Playing a card
Tap any card and it opens to a detail view with two buttons: CLOSE and PLAY. PLAY is the entry point for every play, and it routes you straight into the matching flow with the card already selected:
- An agreement card opens the proposal flow. You pick the recipient, fill the slots, and confirm.
- A standalone aimed at someone else opens targeting. You pick the player, territory, or zone the card asks for, and confirm.
- A self-play (a self-applied value card, or a self-target like Mole Hunt) skips targeting and lands on the confirm screen.
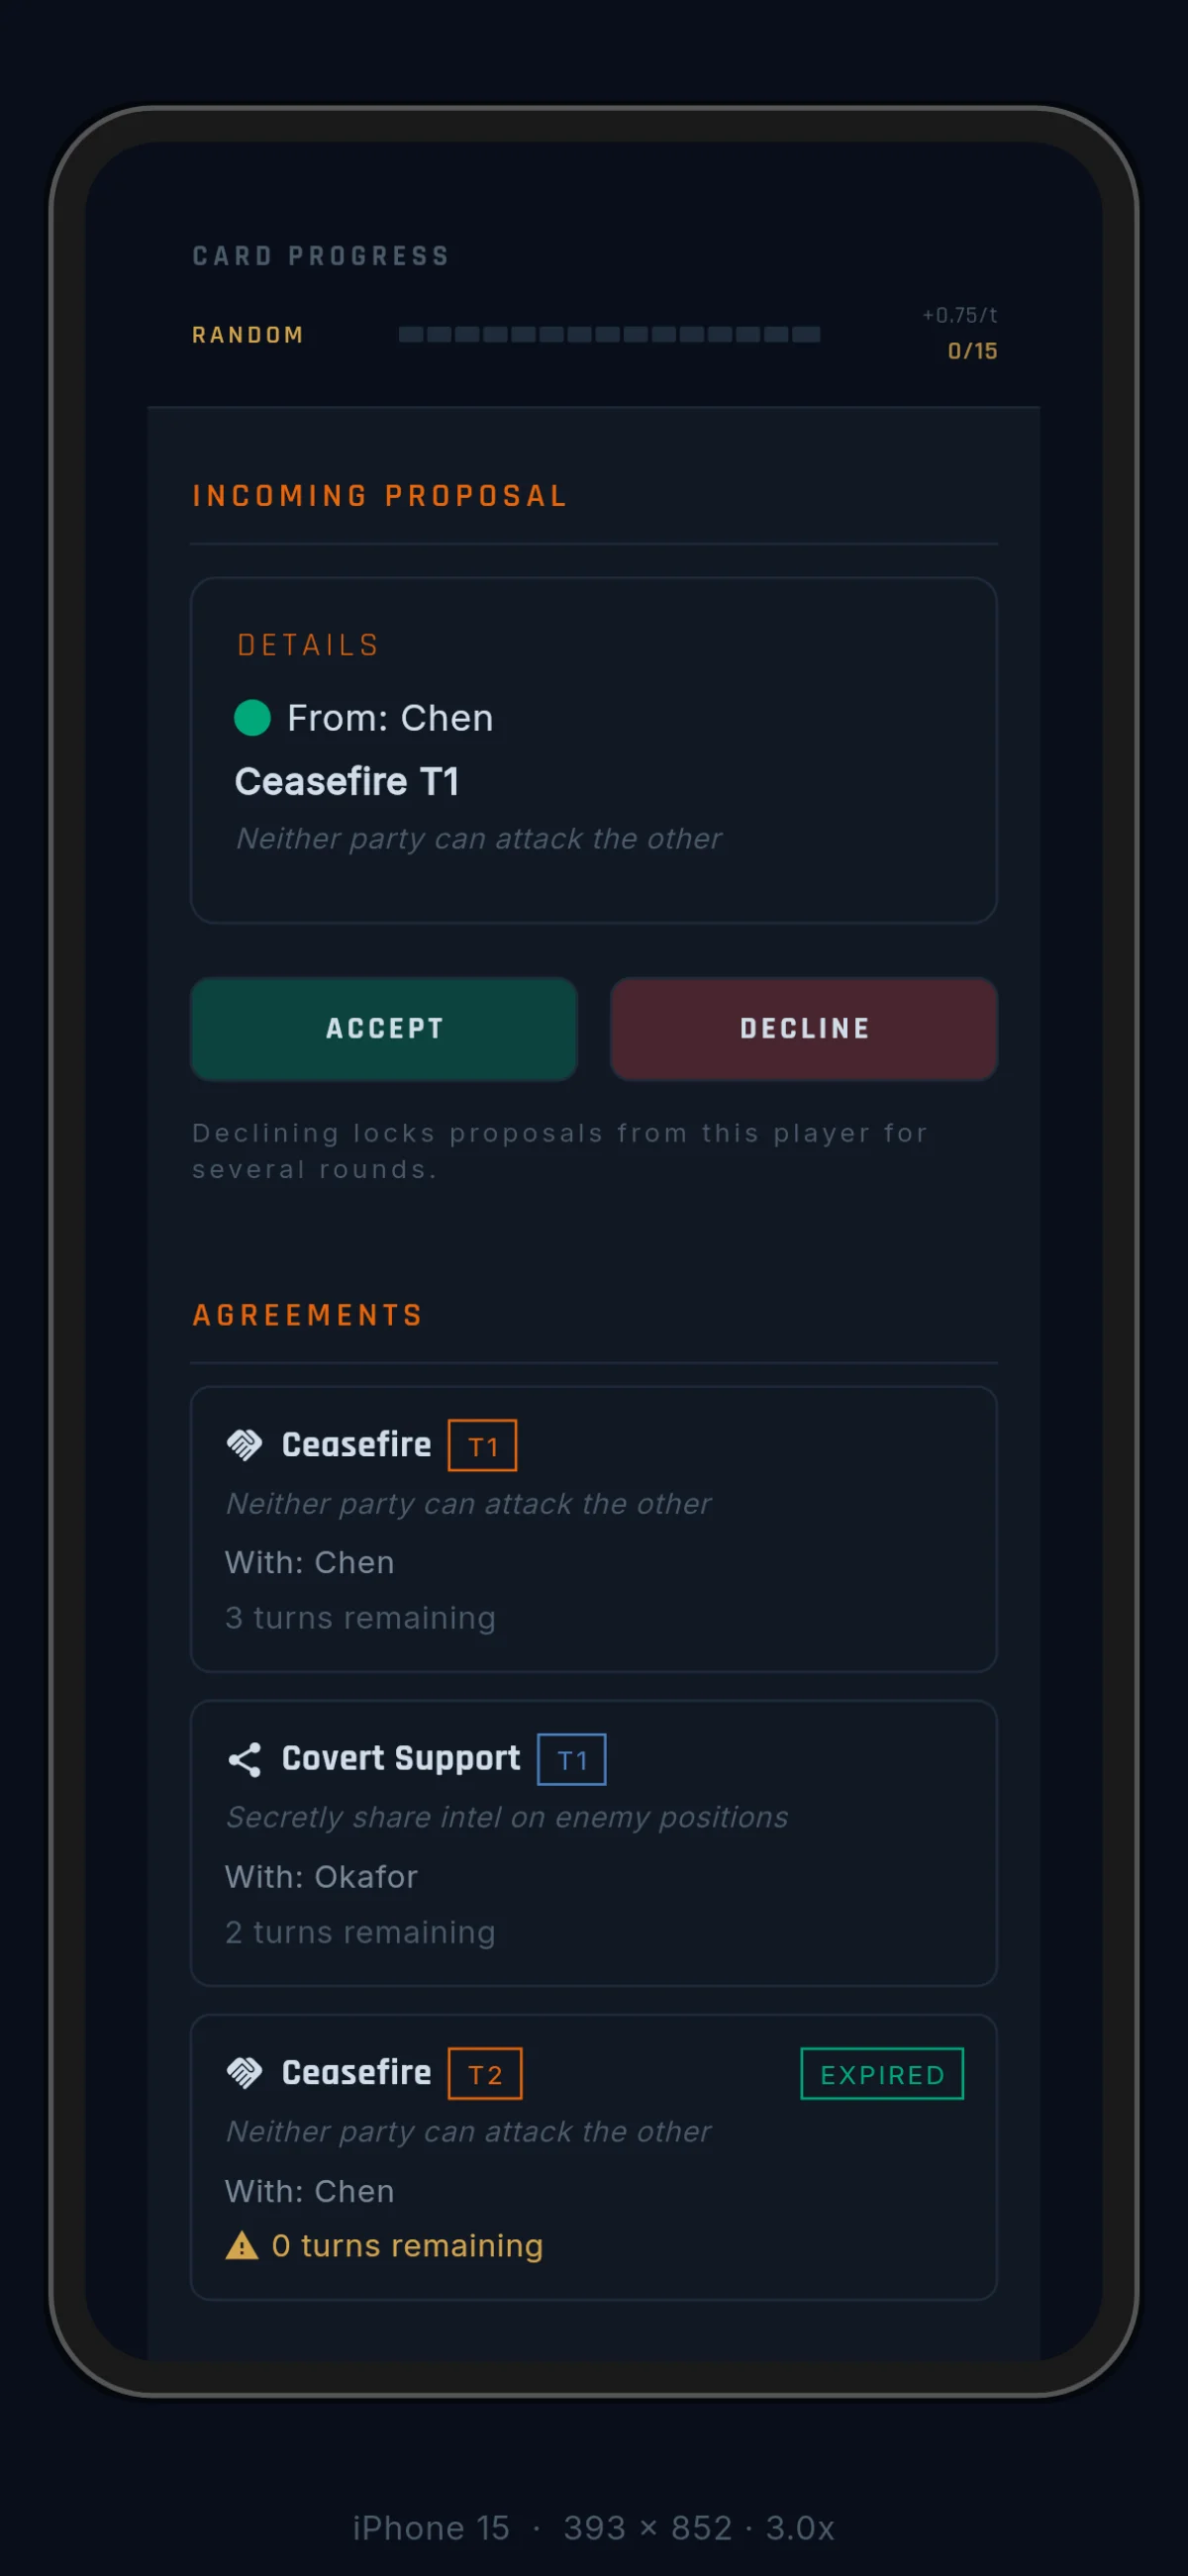
Your Hand tab keeps everything in play where you can see it. Active agreements pin to the top with their remaining-turn counters. Incoming proposals stack above the card grid with Accept and Decline right there. The Hand tab icon shows an alert dot whenever a proposal is waiting on you.
GAMBLE is the one play that isn’t a card. It sits in the hand grid as its own tile and lights up when you hold 3 or more unlocked cards. The trade: burn 3 cards, draw 1 at random — a net loss of two, for when your hand is stale. Below the threshold, the tile stays muted and explains why.
Play limits
Cards are played between turns — any time it isn’t your turn on the board. You can play several in one window, up to a cap per category. The caps reset when your next turn starts, and the Action Economy chips at the top of the Hand panel show what you have left:
| Category | Plays per window | Covers |
|---|---|---|
| AGREEMENT | 1 | proposing an agreement |
| STRIKE | 1 | plays aimed at others: Betrayal, Foreign Aid, Siege, Foment Unrest, Patriotic Duty, the plant cards |
| ASSETS | 2 | self-plays: Trap, Fortify, Forced March, Mole Hunt, scouting, self-applied value |
| GAMBLE | 1 | the GAMBLE tile |
The counters tick down as you play. When one reads 0/N, everything in
that category waits until your next turn resets it, and trying anyway
gets a short “cap reached” notice. During an opponent’s turn the chips
already show the reset values, so you can plan ahead.
Proposing an agreement doesn’t lock you out of other plays. While your
proposal waits, a small chip labeled PROP↻ reminds you that a card is
parked in it — see Negotiation.
The intelligence game
Six standalones play a different game: they move information instead of troops. The loop has four roles.
| Role | Cards | What it does |
|---|---|---|
| Disrupt | Foment Unrest | weakens defense across an opponent’s bonus zone |
| Plant | Recruit Double Agent, False Flag | writes hidden agents onto another player’s roster |
| Sweep | Mole Hunt | reveals what’s been planted on you |
| Scout | Infiltrate, Recon | buys vision instead of guessing at the fog |
Plants do nothing until they’re found. The threat is the discovery: a Mole Hunt sweep publishes everything it finds to the whole table, including who each plant points at. False Flag exists to make that pointing finger lie. Per-card rules, numbers, and counters live in the Card Reference.
Two surfaces keep the intel layer readable. The Intel Digest publishes each round’s resolved spy work (sweeps, plant outcomes, exposures) as a shared record of what just happened to whom. The pending-effects reminder stacks at the top of your screen whenever timed effects are waiting to resolve, and updates live as they do.
Tiers
Most cards come in two tiers. Tier 1 is weaker and more common; Tier 2 is stronger, rarer, and worth more points at game end. A Tier-1 Ceasefire lasts 3 turns; a Tier-2 lasts 5.
Six cards ship at Tier 1 only: Territory Transfer, Betrayal, Forced March, Foreign Aid, Fortify, and Siege. Every block in the Card Reference states its card’s tiers.
Starting hand
You start with 5 cards. Two are pinned — every player gets them:
- Ceasefire (Tier 1): one credible peace offer
- Forced March (Tier 1): one credible tactical play
The other three draw at random from Tier-1 value cards. Map authors and lobby hosts can change both the pinned set and the random pool; when a host overrides the map’s default, the lobby highlights the change in orange so the table sees it before the game starts. See Before the Game.
Hand limit
Your hand holds at most 15 cards (hosts can set 1–30). Going over works differently depending on how you got there:
- You earned past the limit. The new card burns automatically and never enters your hand. You get a notification and a log entry — no prompt, no interruption.
- You inherited past the limit. Cards taken from an eliminated player can push you over. Then you choose: a discard picker shows your over-full hand and you drop cards until you’re back at the limit.
Card locking
When you put a card into a proposal, it locks. A locked card can’t be played, discarded, or offered in another deal, and the PLAY button on its detail view is disabled until the proposal resolves.
Proposals are decided when the other player starts their next turn, not on a clock. At that moment they accept, decline, or let the offer lapse — and your locked card comes back either way: committed to the agreement if they accepted, released to your hand if not. Tying up cards in pending deals costs flexibility; plan your negotiations around it.