TECHNICAL MANUAL // 04
Bonus Zones
Bonus zones: types, payout shapes, territory assignment, labels
This chapter covers the BONUSES tab: zone types, rewards, payout shapes, assigning territories, and labels. The objectives built on top of zones live in Objectives.
What bonuses do
A bonus zone is a group of territories that pays a per-turn return to whoever holds enough of it. Bonuses are the main thing that makes a map strategically interesting — something to fight over beyond raw territory count.
A map without bonuses is technically valid, but the validator warns about it: no bonuses means fewer choices and duller games.
Keep the verbs straight across the next two chapters: bonuses earn, Bonus Groups also earn, and Constellations win. The economy feeds the win conditions; it never is one.
Bonus types
Before creating bonuses, define bonus types — the categories your bonuses sort into. Common examples: “region” for geographic areas, “strategic” for key positions. Type a name at the bottom of the Bonuses panel and press Enter.
Types are labels, not mechanics. They organise your list, and they’re the matching words for the Count by type requirement in Bonus Groups. Names store in lowercase.
Creating a bonus
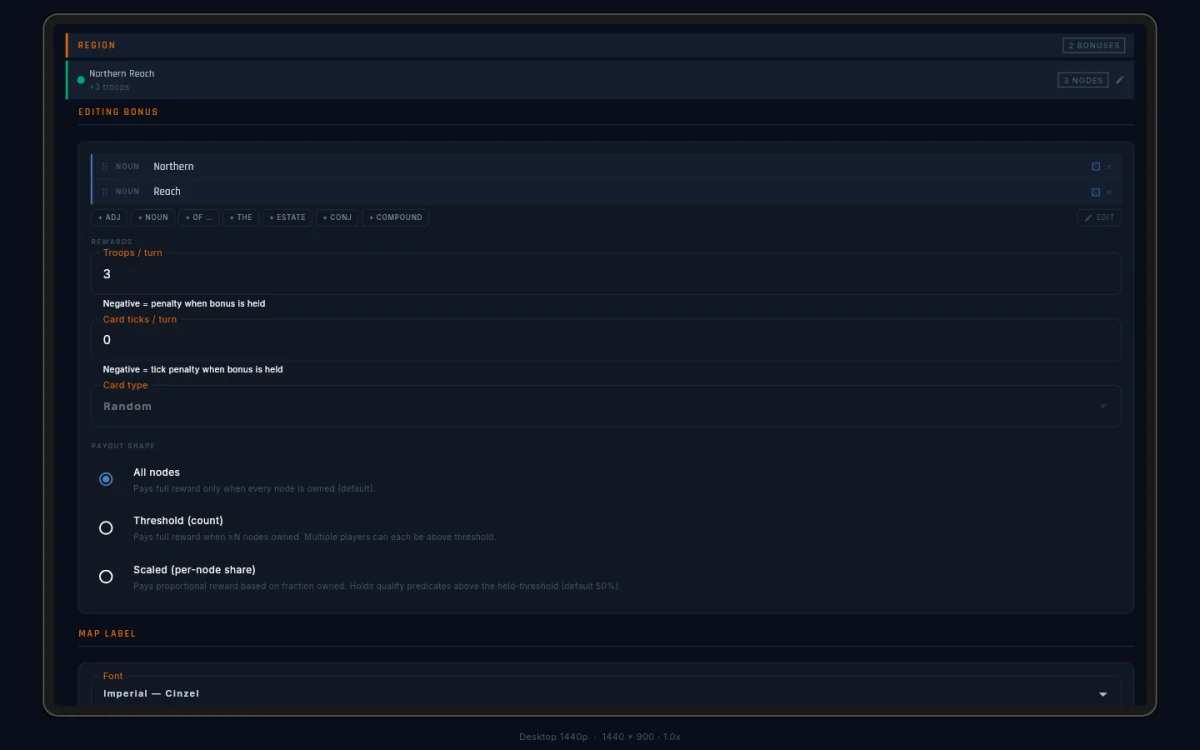
Tap the + next to a type. The new bonus gets a name you can change and a colour from a 12-colour palette. Its fields:
- Name — shown on the canvas and in-game (“Northern Reach”).
- Type — which category it belongs to.
- Territories — the nodes that make up the zone.
- Reward type — troops or cards.
- Reward amount — the per-turn payout. It can be negative; see Negative bonuses.
Troops is the classic reward: extra units in the holder’s deploy. Cards pays progress toward the holder’s next card instead. A card bonus adds two fields:
- Card ticks / turn — how much progress per turn. At 0.25, four held turns earn one card; at 1.0, every held turn does.
- Card type — which of the player’s four draw counters it feeds: agreement, value, standalone, or random.
You can mix freely — some zones paying troops, others cards. The player-side view of all this is Field Manual → Cards.
Payout shape
The payout shape decides when a zone pays. Pick one of three per zone:
| Shape | Pays | Use for |
|---|---|---|
| All nodes | full reward, only when one player holds every territory | tight, defensible zones where control should be all-or-nothing |
| Threshold | full reward to anyone holding at least N territories | wide zones where consolidating most of it should count |
| Scaled | a share per territory, from the first one | sprawling zones where you want a reason to push from 40% to 60% |
Three things worth knowing:
- All nodes is winner-take-all: lose a single territory and the
payout drops to zero. The in-game badge reads
3/5 (all). - Threshold can pay several players at once — anyone over the bar.
The badge reads
3/6 (min 4)so players know the bar. - Scaled has no gate at all. It’s always paying everyone their
share, and the badge stays a bare
2/6with the payout written underneath.
A Scaled zone carries one extra field: Counts-as-held ratio (objectives only). Its helper text is the whole rule: held for objectives when the owned fraction reaches this value (default 0.5), and it never gates payout. The ratio matters only to requirements in Bonus Groups, and only on Scaled zones — the other two shapes ignore it, and a stale value left behind after switching shapes is dropped on save.
If an old save somehow carries both a threshold and a scaled share, the panel shows a red “Conflicting payout shape” warning. Re-pick a shape and save; the conflict heals.
In the editor and the map viewer, each bonus row’s own badge carries
the shape too: 6 NODES · ALL, 4 NODES · MIN 3, 4 NODES · PRO-RATA (pro-rata is the Scaled shape — a share per territory).


Assigning territories
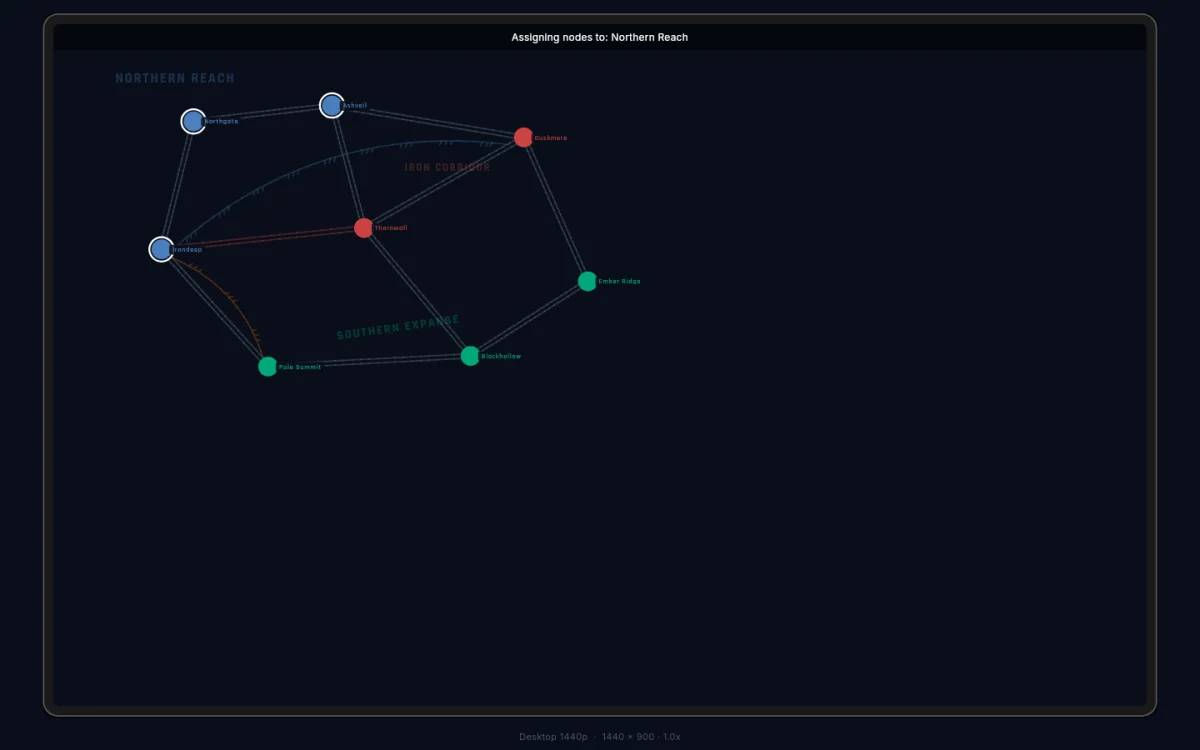
Select a bonus and the canvas switches to assignment mode, with a header bar naming the zone you’re editing. Member nodes wear rings in the zone’s colour; unassigned nodes show black.
Double-tap a node to add it; double-tap again to remove it. A territory can belong to several zones at once — it wears one ring per membership.
Deleting bonuses
Every row has a one-tap ×. Deleting cleans up after itself:
- Removing a bonus scrubs it from every Bonus Group requirement that named it. A requirement left empty still saves — the validator flags it so you can fix it before publishing.
- Removing a Bonus Group drops any Constellation built on it from its category.
- Removing a Victory Category unhooks its Constellations; they survive unassigned.
Nothing is left pointing at a deleted bonus after a delete, save, and reload.
Negative bonuses
Both the troop reward and the card tick rate accept negative numbers. A negative zone charges its holder instead of paying — fewer troops at deploy, or a drag on card progress. Negative values show in bold red in the panel and on the canvas, so they’re impossible to miss.
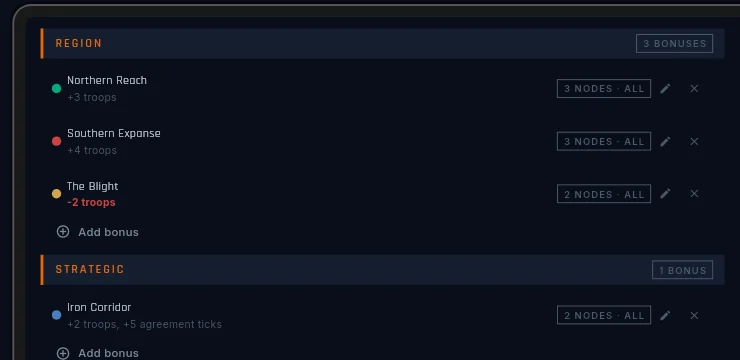
Negative zones are a design tool, not a trick:
- Cursed ground — a tempting central cluster that punishes whoever takes all of it. Map control or economy: pick one.
- A trap inside a prize — a small negative zone inside a bigger positive one. Taking the outer zone is good; sweeping the inner one too is a wash. “Where do I stop?” becomes a real question.
- A risk gradient — the richest zones sit next to the costliest, so expansion stays dangerous.
Zone labels
Each bonus gets a draggable label that shows on the canvas at low opacity, naming the zone for players. Drag it over its region.
Labels support a curated set of 12 fonts, a size, a rotation angle, and a colour tint from a preset palette.